
Ever wonder how a 2D concept illustration ends up as a fully rendered 3D character in a game? It’s definitely a team effort involving several different artists. Let’s take a look at the whole process from start to finish!
Concept art
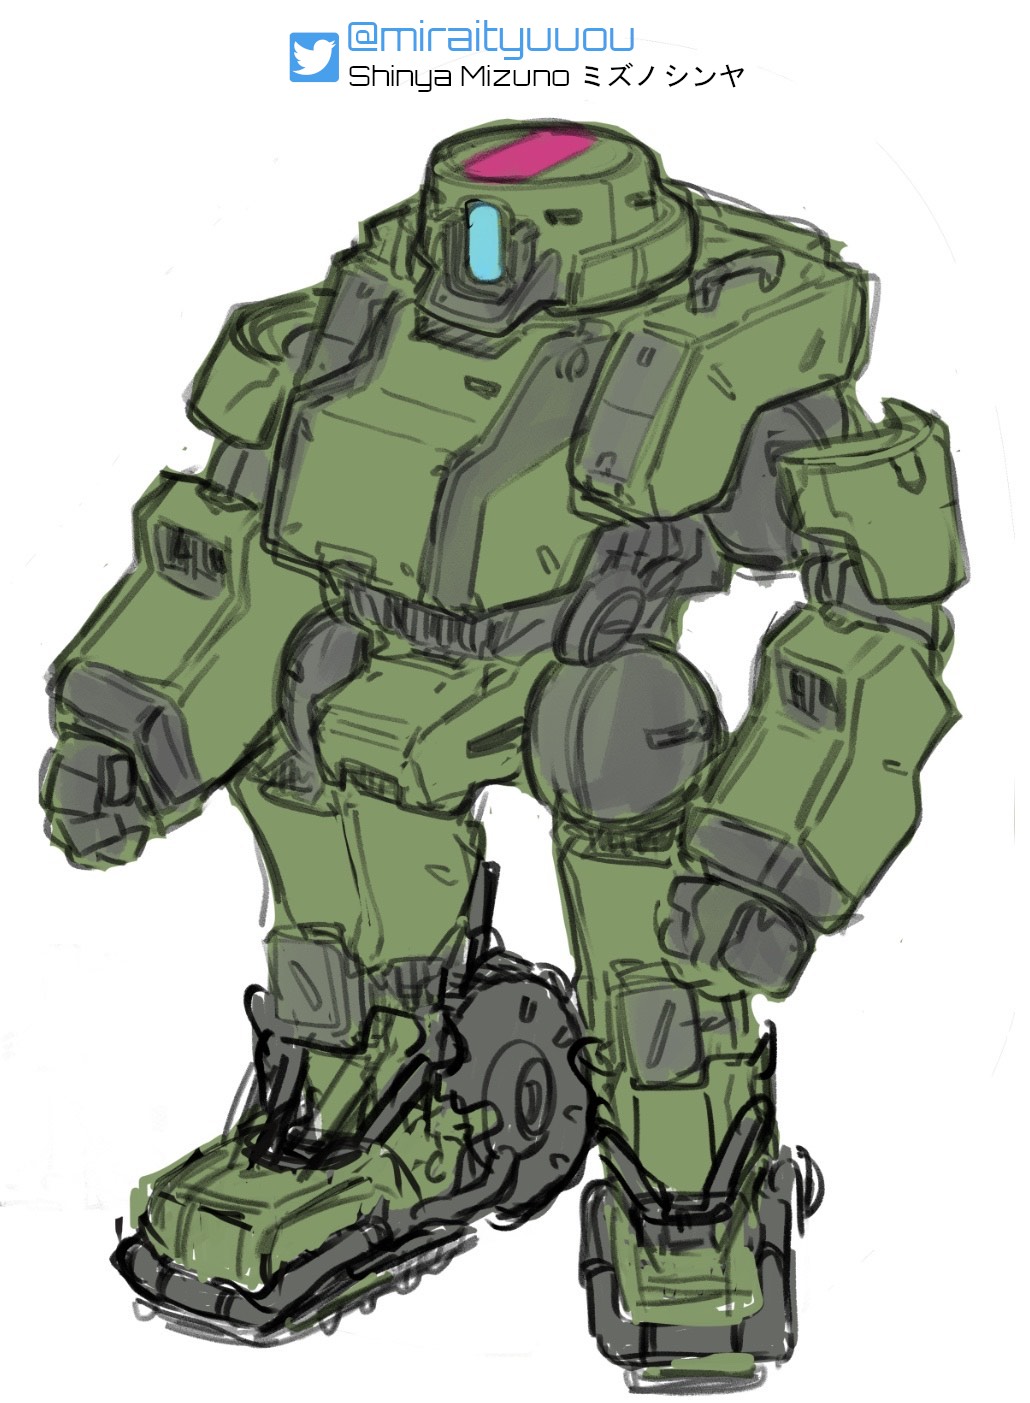
The process begins with a 2D illustrator producing concept art with an initial character design. Japanese artist Shinya Mizuno is our lead mecha designer, and was already well know for his own quirky mecha illustrations before he joined the development team on Zecha Tactics. For Zecha Tactics, the team gives Mizuno basic specifications for each type of mech needed in the game. Mizuno then uses his creativity and design skills to bring the mechs to life in his initial concept illustrations.
From Mizuno’s concepts to turnaround drawings
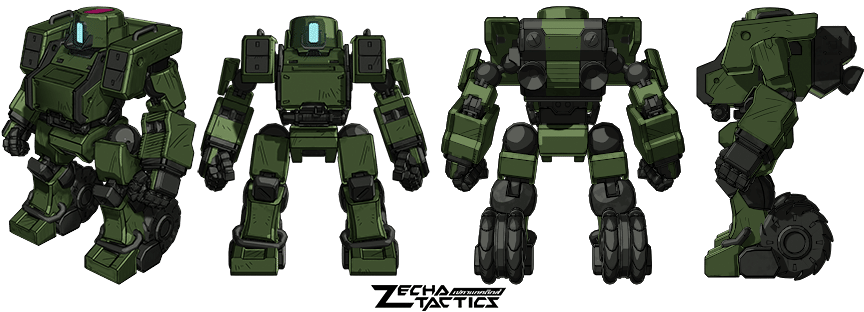
Once the team decides to include one of Mizuno’s concepts in the game, another illustrator on the team takes the concept drawing and starts working on turnaround sketches. While concept drawings focus on outlining the basic feeling of a character, turnaround images are more like technical blueprints to help a 3D artist translate the 2D concept into a 3D model. Concept art is often drawn from only one angle, but turnarounds are a series of front, side, and back images that give a 3D artist information from multiple angles to assist the modeling process.
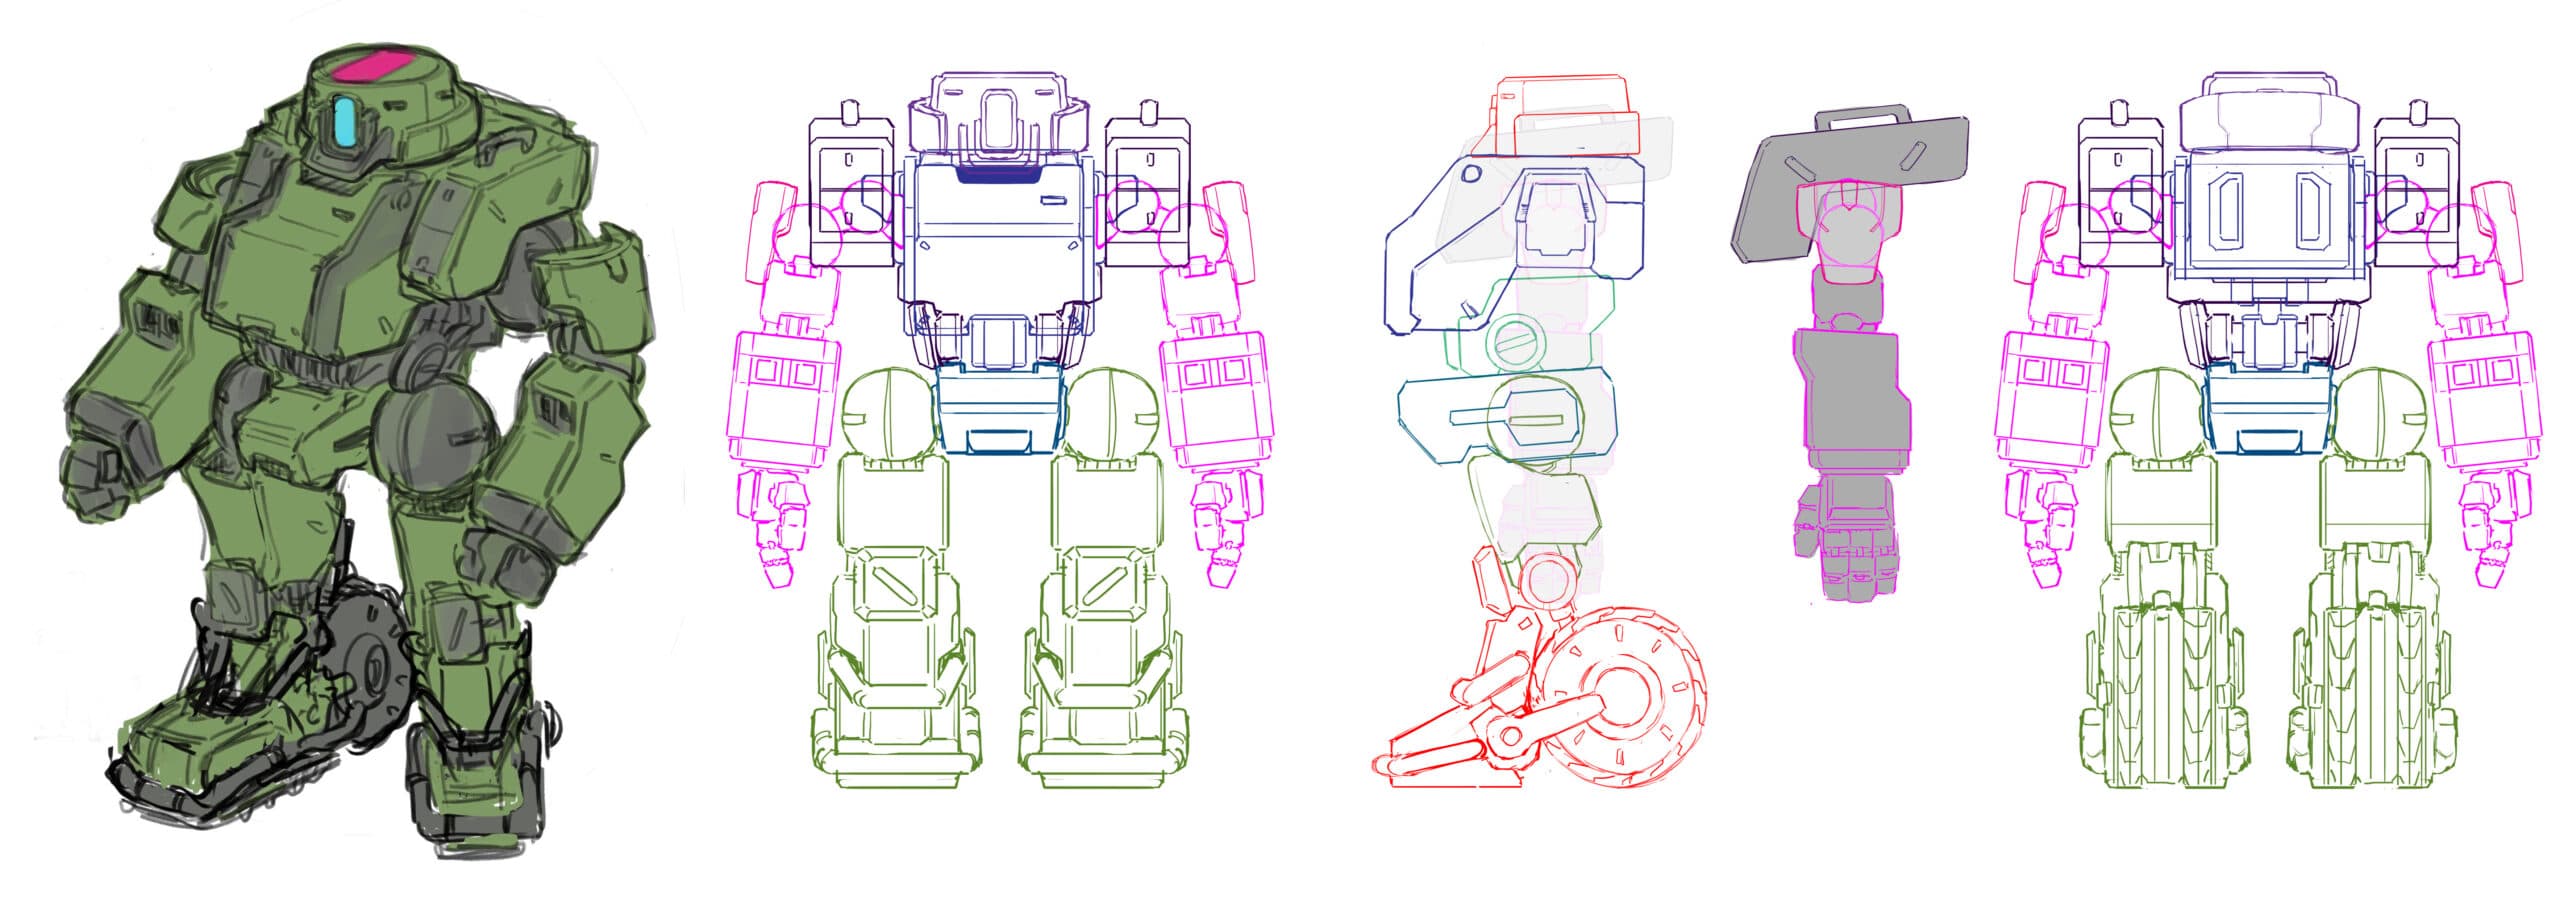
The turnaround artist takes design cues from Mizuno’s initial concept art and extrapolates how the mecha would look from different perspectives. Creating the front view of the turnaround is usually the easiest, as that’s where most of the details have normally been addressed in the initial concept art. The process then moves to drawing the side and back views, where turnaround artists often have to come up with their own interpretations that match the concept illustration, sometime referencing Mizuno’s past work to capture the spirit of the initial design.
Difficulties can sometimes arise from blind spots in the initial concept drawing. For example, all of the internal joints have to be designed by turnaround artists. The joints aren’t visible in the concept, but are essential for creating a 3D model. Artists often refer to other references like old Gundam anime or plastic model kits. Designing each part one at a time, an artist might have to reference several difference sources to complete the turnarounds.
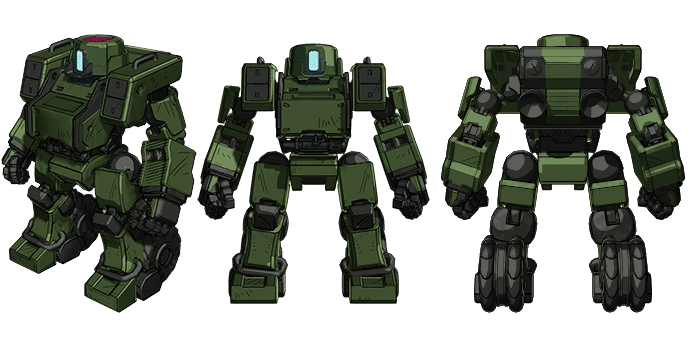
3D modeling
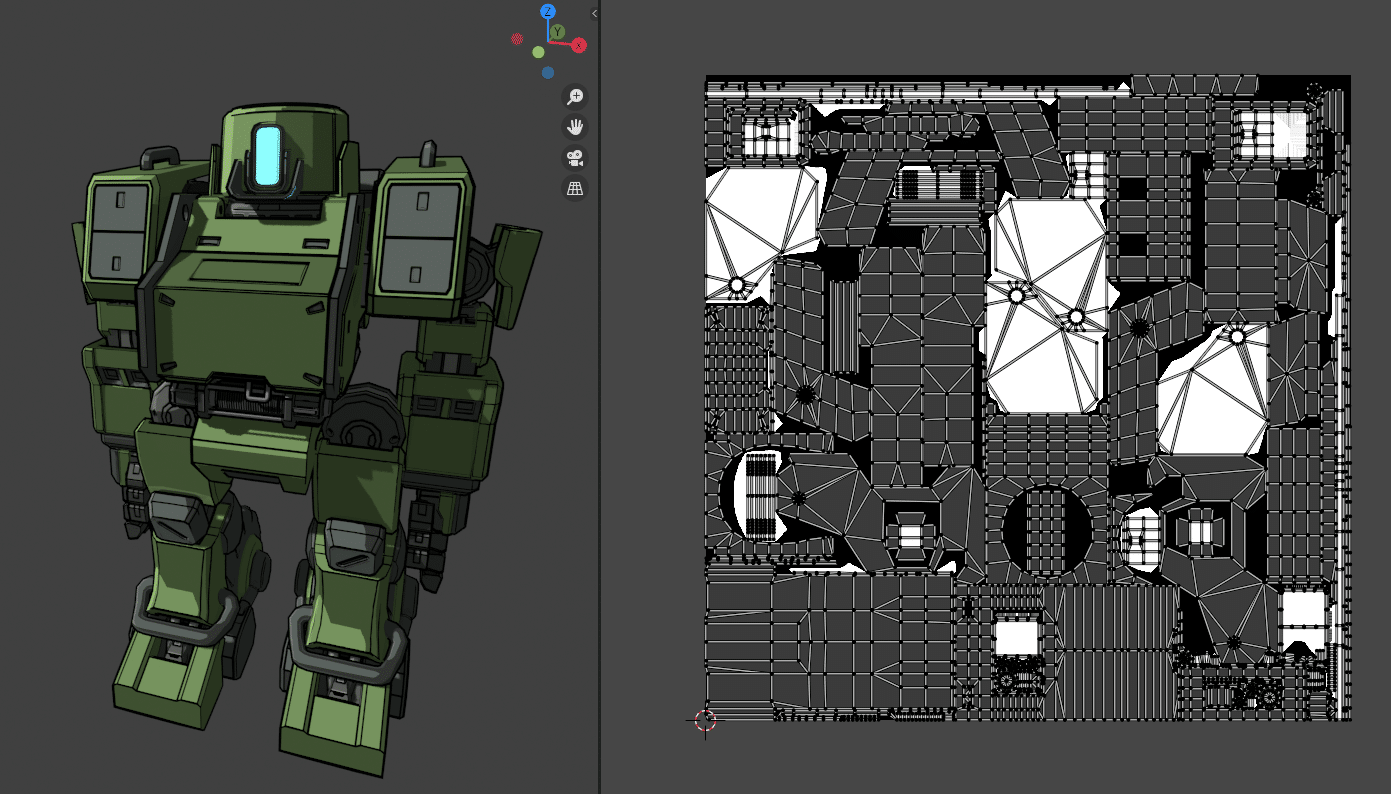
When the turnaround designs are finalized, they are handed off to a 3D artist. Using the turnarounds as a guide, the 3D artist first blocks out a rough 3D model to capture the basic proportions and look of the mech. After creating the basic blocking for the model, the 3D artist can then start to make adjustments and add details to get the look closer to the turnaround drawings.
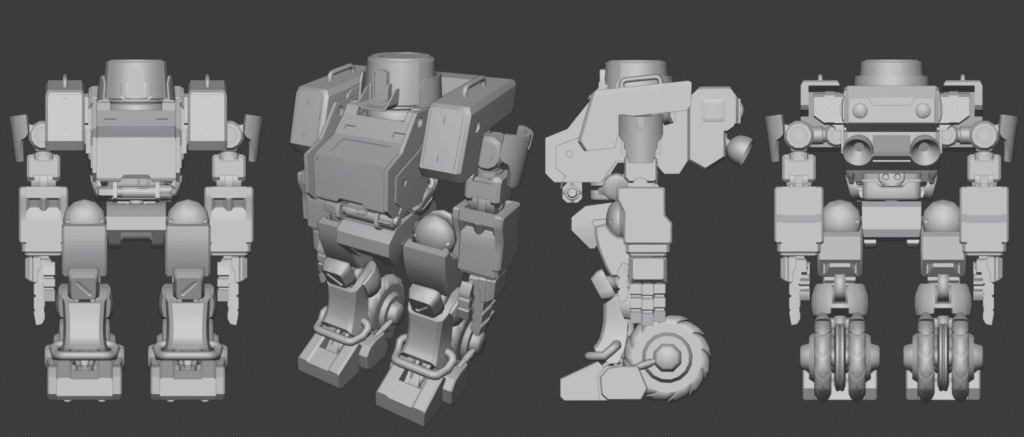
This is often an iterative process as others on the team review the work in progress and give feedback. Even with the help of turnaround drawings, the 3D artist still has to make additional creative and technical decisions to bring the model to life.
Sometimes parts of the design that look good in 2D don’t look quite right in 3D, such as proportions or outline edges, and adjustments have to be made to the model. More complicated problems might arise with details like knee and wrist joints, which have to function realistically to support animation without clipping. It can take up to one month of work to finish a 3D model.
Texture mapping and shading
As work is finished up on the 3D model, another artist creates a texture map for the model. Also called a UV map, the map is a collection of 2D images that are projected onto the 3D model. These textures include things like color and simulated surface textures that can make parts of the mech look dull and rough or shiny and smooth.
A texture map for a single model is usually stored as a square image. The square is further divided into shapes that correspond to every surface on the model. When “wrapping” this texture map onto the 3D model, the rendering software references the coordinates for each surface area to ensure that the correct shape within the texture map is projected onto the corresponding surface of the 3D model.
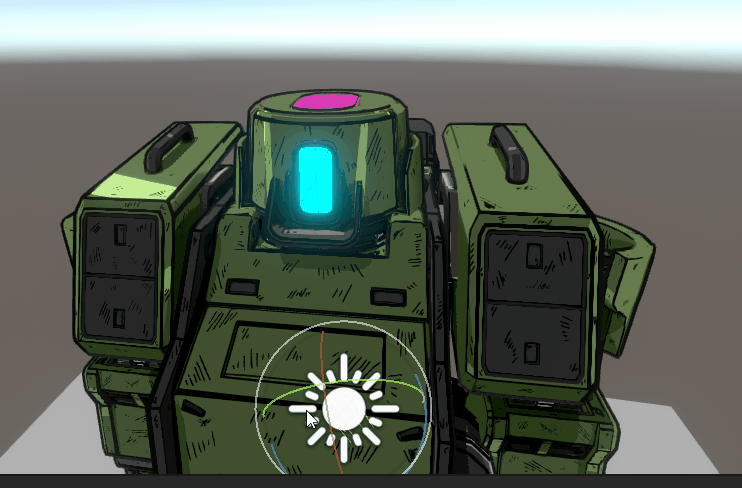
As a final step in the modeling process, a technical artist develops shaders for the model. While the texture map creates the basic look of the model, a shader defines how the surface of model looks when light is projected onto it. Games like Zecha Tactics that aim to recreate the flat cel shaded look of anime in 3D require a lot of specialized work in developing shaders. In many ways, the reflection of light on a cel shaded model is not as straightforward as a model with more photorealistic lighting.
Finishing the model and ready for action!
After the development team is happy with the 3D model, the model is sent to the animation team for animation rigging. Rigging and animation is another team process that we hope to cover in a future blog post!
Want to keep updated with all the latest developments on Zecha Tactics?
Sign up for the Zecha Tactics newsletter and also get an exclusive wallpaper!